
Toyota Tacoma and FJ Cruiser Hydraulic Bearing Installation
First off, congratulations on the purchase of your Clutch Masters Internal Hydraulic Slave Cylinder Release Bearing for your Toyota Tacoma or FJ Cruiser. The 6-speed manual RA60 or RA61 are great transmissions from Aisin but you wouldn't be here if they were 100% perfect. As you've either discovered or are installing this kit to prevent, these transmission do have their weaknesses. These weakness stem from a preloaded throwout bearing on the clutch diaphragm that presents premature wear and squeaking of the throwout bearing; wear on the aluminum snout that can cause binding with the throwout bearing; pivot ball wear that can prevent smooth shifting or making it difficult to get into gear; or worse case scenario the snout or pivot ball shearing off.
When we set out to design this kit we wanted to eliminate the possibility of catastrophic failure and we're confident we have accomplished just that. By using an internal hydraulic slave cylinder that is centered around the input shaft, we have eliminated any awkward motions that can cause stress or wear on the snout. The way the OE clutch fork actuates causes forward and lateral stress on the aluminum snout. The way our kit is designed, an aluminum spacer registers snuggly around the aluminum snout and the small step that is on the face of the transmission. This spacer then slides into the inside diameter of the hydraulic slave housing. Nothing is riding on the aluminum snout anymore and any chance of wear is greatly reduced because all of the aluminum parts in this kit are Type 3 hard coat anodized.
The benefits you will see from installing this kit include a lightened peddle feel, consistent pressure for easier and smoother engagement, less moving parts means less chance of failure and wear, and reduced driveline shock.
On to the fun stuff! With your kit you got the diagram below:
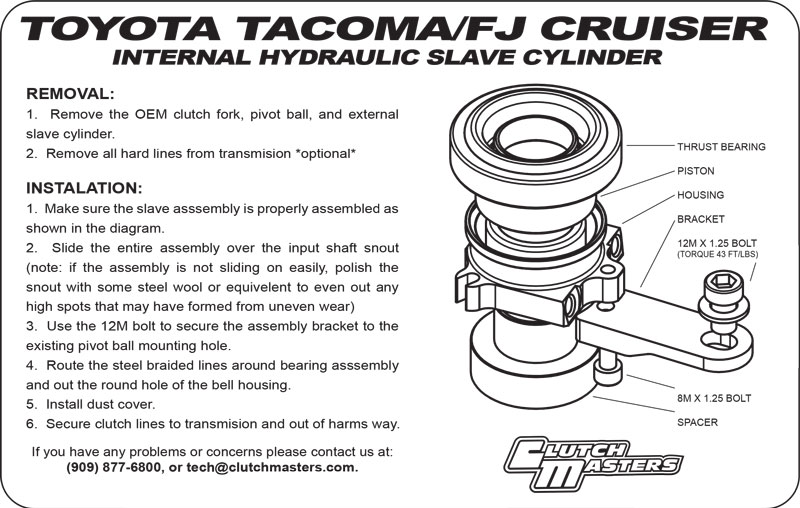
Below we will get into more detail on the installation of this kit. We will only be covering the installation of the internal slave cylinder and not the removal or installation process of the transmission and other driveline components, please refer to the factory service manual for how to complete those steps.
The parts you will need for this installation include:- - 10mm socket
- - 12mm socket
- - brake line end wrench
- - flathead screwdriver
- - 1/2" open ended wrench
- - 10mm allen
- - Loc-Tite
- - DOT 3 brake fluid
- - Small amount of assembly lube
- - a couple of zip-ties
**Please Note - The following directions are for an FJ Cruiser. However, the Tacoma is only slightly different in the way the clutch feed line is ran.**1. Start by completely removing the transmission
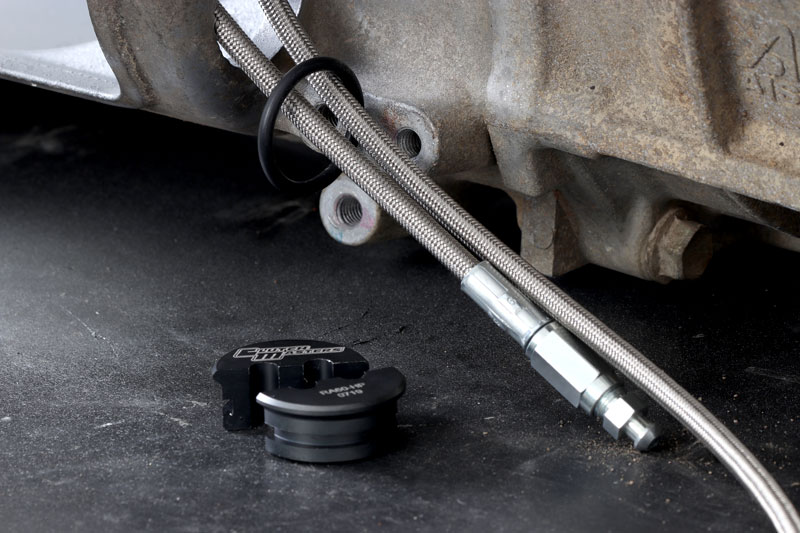
2. Once the transmission is out of the vehicle, remove the factory clutch fork and throwout bearing assembly, pivot ball and slave cylinder. It is optional to remove all of the hard lines on the side of the transmission but we did so for a cleaner install.
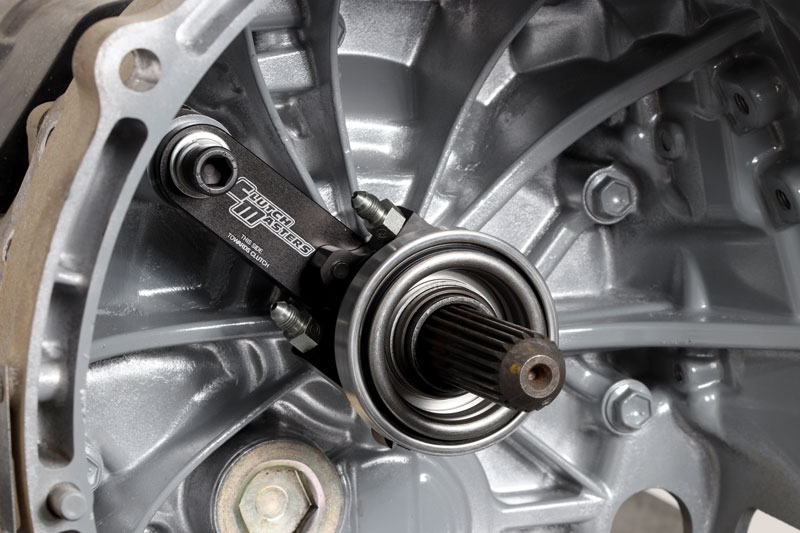
3. With all of the factory components removed you can start to install the Clutch Masters internal slave assembly. Slide the entire assembly over the aluminum snout or quill. The spacer goes on first and then the slave cylinder with the throwout bearing and mounting bracket attached to it.
**The spacer can be difficult to slide onto the snout if it has any uneven wear. If you encounter difficulty sliding the spacer on, you will need to even out any high spots. The end of the snout has a tendency to "mushroom" due to the way the throwout bearing rides on it. Some fine grit sand paper or emory cloth should easily break down those high spots and allow you to slide the spacer on. It is designed to be a snug fit but should go on easily once any uneven wear is flattened out**
4. With the spacer and hydraulic slave assembly slid onto the snout, position the mounting bracket so the hole on the bracket is located to the threaded hole where the pivot ball used to be. We put a small dab of red Loc-Tite on the 12x1.25 bolt before threading it into the hole with the provided washer and lock washer and torquing the bolt down to 43 ft/lbs. The Loc-Tite is most likely overkill with a lock washer and being properly torqued but better to error on the extra safe side with a bolt inside of the bellhousing.
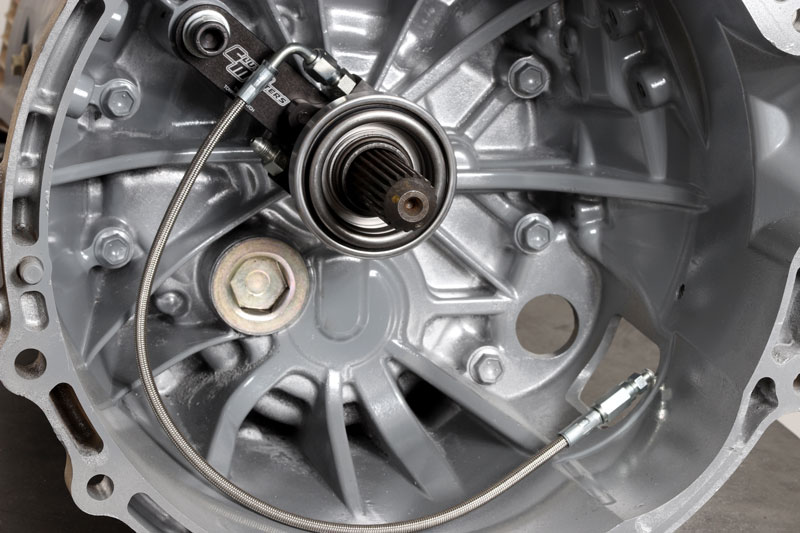
5. Grab the shorter of the two stainless steel lines. The shorter line is your bleed line. Thread the bleed line onto the top fitting of the slave cylinder. This line has to be on top in order to get any excess air out of the hydraulic system. Tighten the fitting down finger tight for right now and route the line through the small round hole where the OE slave cylinder used to be.
**DO NOT tighten the fittings that have been screwed into the slave cylinder. These are tightened to spec before they leave Clutch Masters. They have an o-ring seal and if they are tightened down any more you can compromise the o-ring and create a potential leak point**
6. Grab the longer clutch feed line and screw it (finger tight for now) onto the slave cylinder and route it up and over the slave cylinder and out the small round hole with the bleed line.
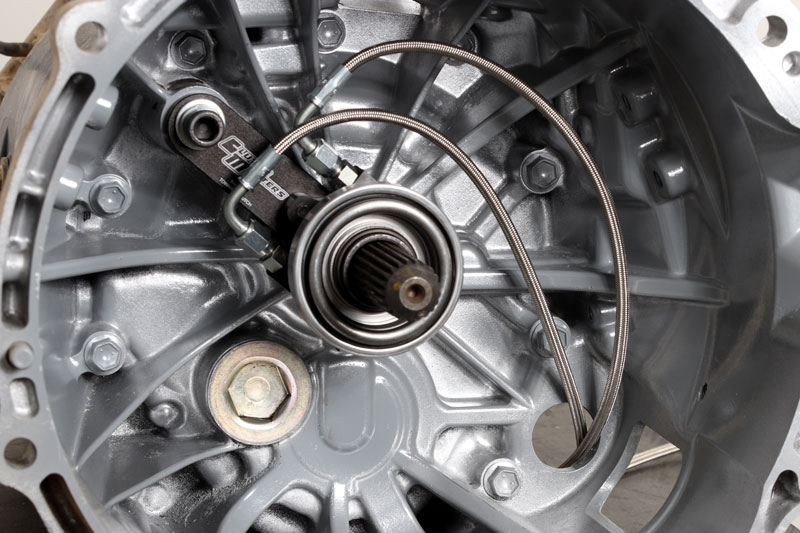
7. Grab your little round dust shield and the o-ring for it. Feed the two lines through the o-ring and move the o-ring up to the hole where the two lines come out of the bellhousing. Grab the two halves of the dust cover and place the feed and bleed lines inside the dust cover. Position the two halves of the dust cover together and wrap the o-ring around the machined groove on the cover. Grab a small bit of grease and grease the o-ring. The grease is just to help you get the dust cover slid into the hole as it is designed to be a tight fit.
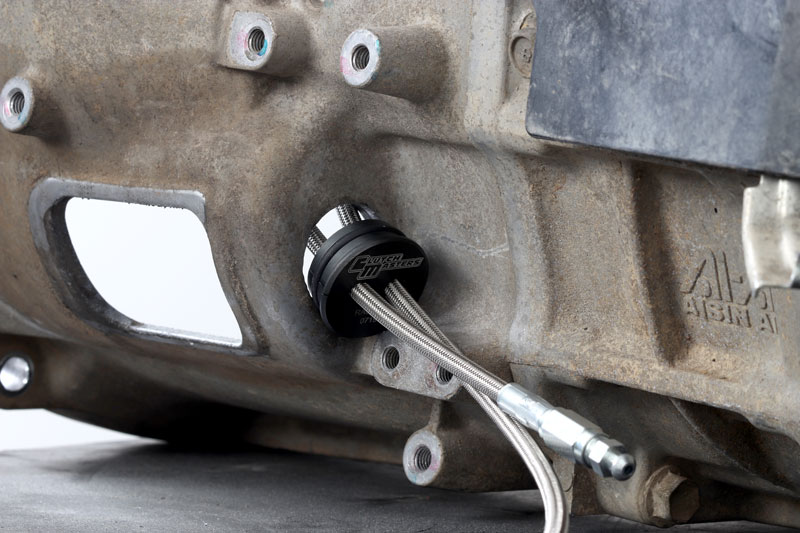
8. With the dust cover installed make sure the lines are pulled all the way through and that there is no slack of the lines inside the bellhousing. The lines should be positioned as close to the inside of the bellhousing as possible. With the lines positioned, grab your 1/2" wrench and tighten them down snug. Again you are just tightening down the fittings on the end of the lines, not tightening the fittings that are on the slave cylinder.
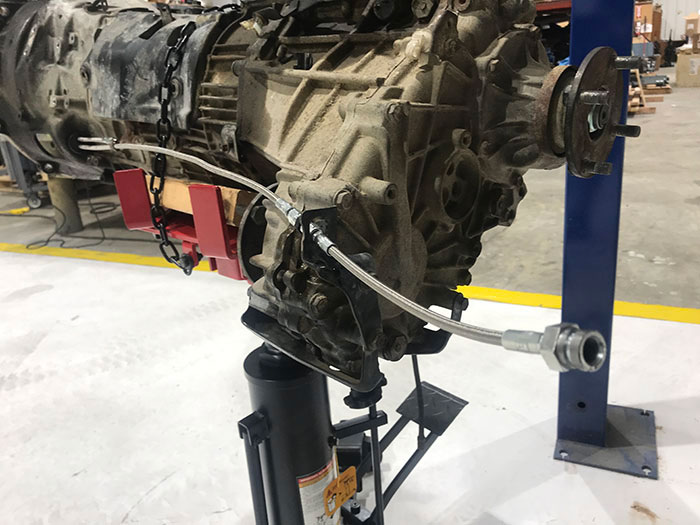
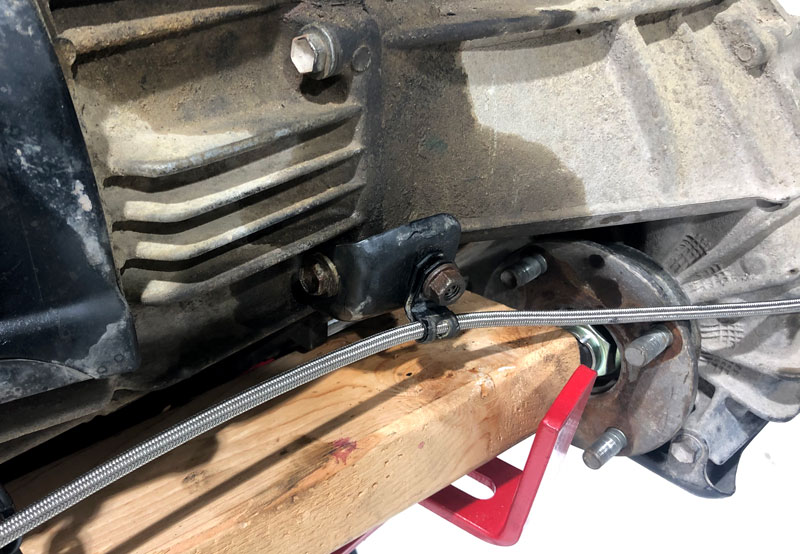
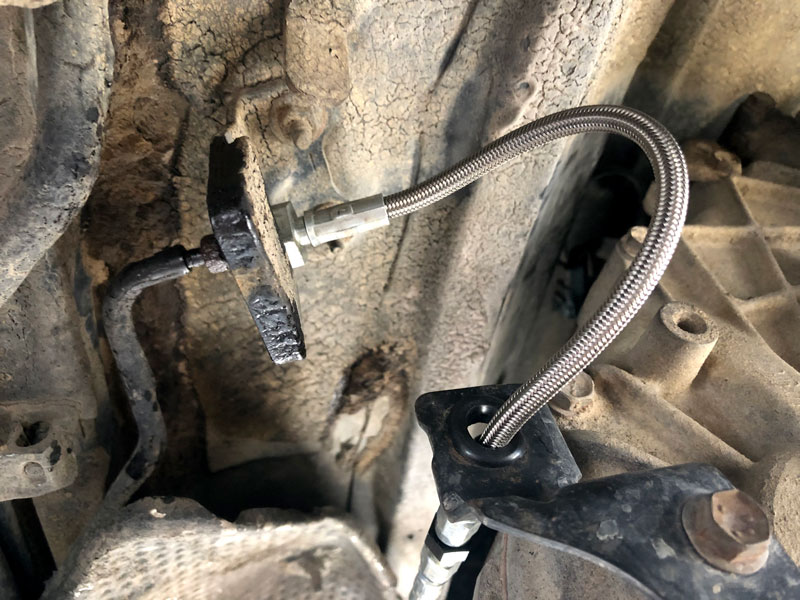
9. Grab the small provided grommet and position it in the hole that is on the bracket attached to the transfer case where the OE soft line attached to the hard lines on the transmission. The grommet is just an extra precaution to prevent any rubbing on the stainless line and the bracket. Once the grommet is in place, feed the long stainless line through the grommet. We reused one of the factory clamps that were holding the hard lines and wrapped it around our stainless line and re-affixed it to the transmission. With all the slack pulled out of the line one clamp is adequate to keep the line tucked to the side and of the way of the front driveshaft. We zip-tied the bleed line to the feed line to keep it tucked up and out of the way as well **This step won't apply if you opted to keep the factory hard lines attached to the transmission. If you opted to keep the hard lines on the transmission, zip tie the feed and bleed lines in a few places to the hard lines to keep them safe and tucked up out of the way**
**The Tacoma clutch feed line does not go to the back of the transmission, instead it goes straight up the firewall. The feed line we send will work for both applications**
10. You are now ready to reinstall your transmission. Go through all the steps to get the transmission back into place. Once the transmission is back in place you can attach the clutch feed line to the OE body hard line. With everything in place you can now bleed the clutch lines. Bleeding the lines and slave cylinder is simple and is performed the same as any other hydraulic line bleeding process.
11. With the lines bled, check for any leaks. If there are no leaks continue with reinstalling the rest of the driveline components.
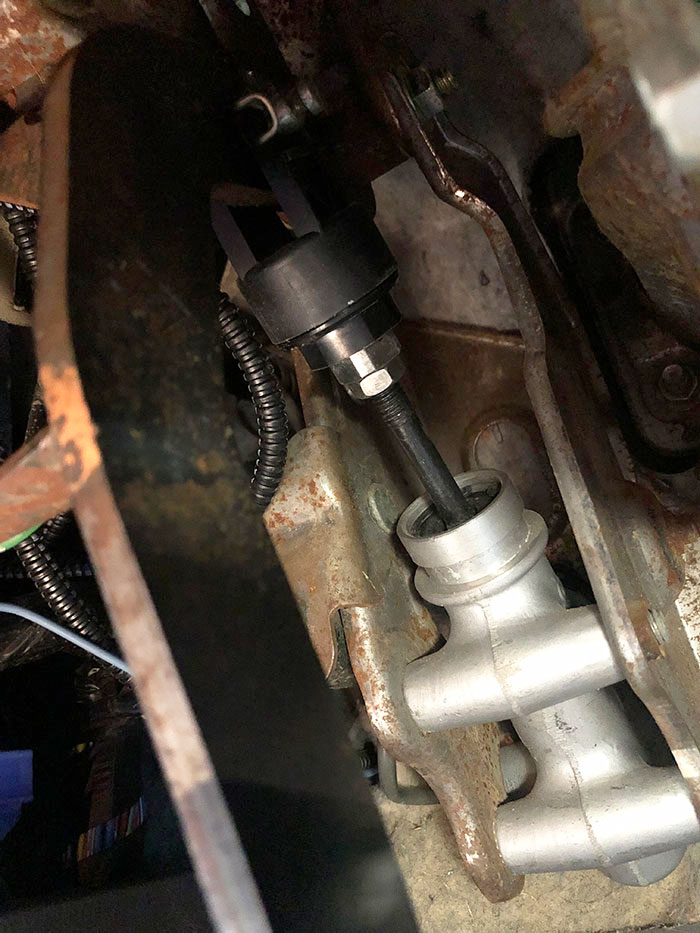
12. With everything installed you can start the truck and feel the clutch pedal and where it is engaging and disengaging. Slowly lift the clutch pedal from the floor and you will feel where the clutch starts to grab. You may need to adjust where the clutch is disengaging to suit you. This is done by adjusting the rod that actuates the clutch master cylinder inside of the truck. Look up underneath your dash and you will see this. Adjust the rod in or out to where the clutch is engaging and disengaging at your preferred height. We suggest adjusting the clutch rod and pedal to engage mid stroke of the clutch pedal. This will give you the best feel and operation of your clutch.
We hope you enjoy your new Clutch Masters Internal Hydraulic Slave Cylinder. We appreciate any feedback and reviews you might have and you can easily leave a review on the product page here: Clutch Masters Internal Hydraulic Slave Cylinder for Toyota Tacoma and FJ Cruiser
Now go out and blaze some trails!
